How To Install DIY Floating Shelves
Like cute photos of your dog, kitchen storage is pretty much one of those things you can never have enough of in my book. Kate here, and today I’m super excited to share these DIY floating shelves we just installed!
Floating kitchen shelves are a design element that have been on my pinterest boards ever since I can remember, and this new house had the perfect spot for a pair of them. I know open shelving in the kitchen is always a hotly debated item, but personally I think any opportunity to display another plant or some decanted dry goods is one we should all jump at.
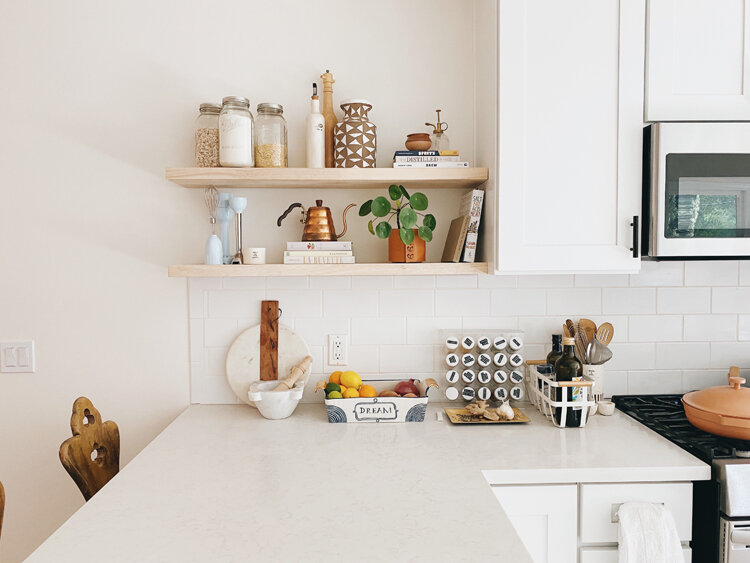
The previous owners of this house had redone the entire kitchen, and while they made some choices we really loved it always seemed weird that they just left this space above the backsplash bare.
Here’s what this part of the kitchen looked like when we moved in:
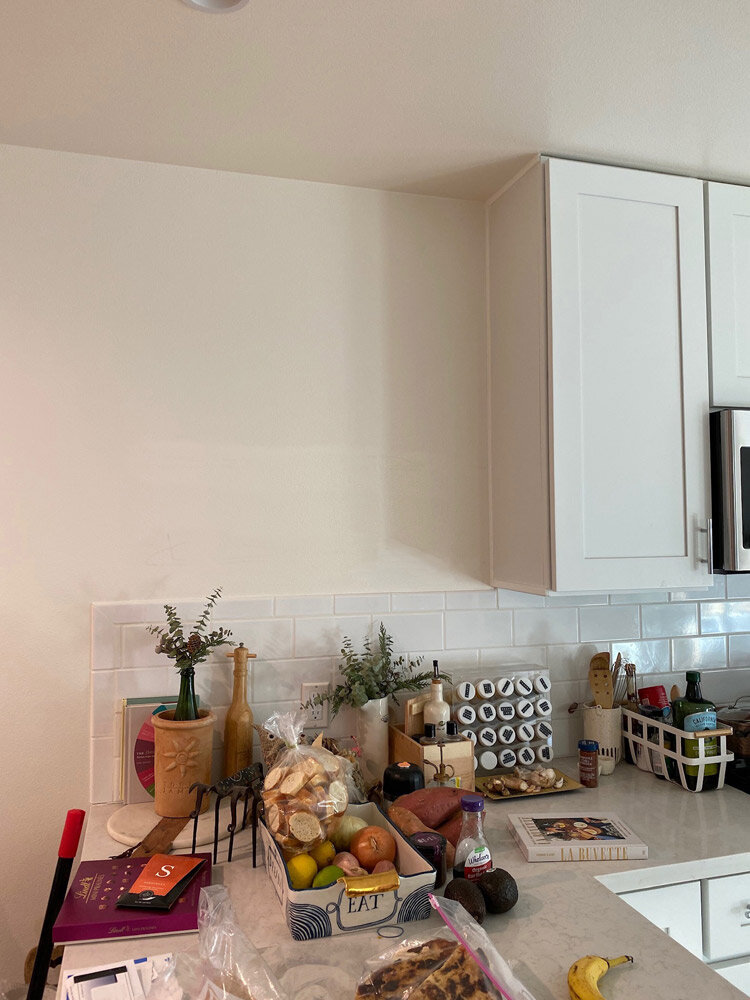
and tbh this is what the counter looks like most days…
I knew immediately when we moved in that floating shelves would be perfect in this spot, and because the house is relatively small it was also a great opportunity to add more kitchen storage!
After we created a DIY waterfall butcher block counter for our washer and dryer, we had some of the beautiful butcher block wood leftover that I knew would make gorgeous floating shelves. I also LOVE incorporating the same materials in different parts of a room or house as it really helps to tell a cohesive story and keep the design consistent.
Because of the small size of the house and the totally open concept design, I felt like doing shelves with brackets might make the space look cluttered. It really seemed like that space wanted floating shelves with no visible brackets, and I’ve always wanted to learn how to create them.
I’ll be honest, this was definitely not the type of project you can just eyeball. The measuring and drilling is definitely more meticulous because of the fact that you have to ensure you mount the brackets to the wall at a 90 degree angle, and then need to drill the holes in the shelves exactly the same distance apart as the brackets. I am very lucky that my dad is an amazing craftsman and has much more patience and discipline than I do, and he was an absolutely massive help in completing this project.
With that being said, I think it was definitely worth the extra time and work of measuring over and over at every step and I think it can definitely be done if you’re willing to be patient and meticulous! Here’s how we made it happen:
How To Install DIY Floating Shelves
Materials:
Wood for shelves - I used this butcher block and would recommend something at least 1 1/2” thick
Solid steel floating shelf brackets - I used 6 - 3 for each shelf, and secured them to 3 different wall studs
Drill
Self-centering drill guide - this little tool is absolutely essential to getting the holes for the shelf brackets straight and centered when you drill them in, otherwise the shelves probably won’t slide onto the brackets correctly.
1/2” drill bit (same thickness as the brackets I used linked above)
Sander or sandpaper

this is what the self-centering drill bit looks like. It clamps onto your shelf and provides a guide so that your bracket holes end up perfectly centered and horizontal
Directions:
1. Determine where you want to mount your shelves and how long you want them to be, then ensure that the area has studs to which you can mount the shelf brackets using a stud finder (I like this magnetic one). The wood I used was pretty heavy, so I ended up mounting each shelf to 3 studs to make sure they were extremely sturdy.
2. Cut your shelves to the desired size using a circular saw or something similar (Mine are about 40 inches long and 8.5 inches deep). Give them a decent sand to make sure there are no rough edges.
3. Carefully mount your brackets to the studs, making sure that they are sticking out perfectly perpendicular to the wall at a 90 degree angle (this way they will actually slide into the holes you drill in the shelves). We had to adjust ours a few times, but you can use a square to make sure the angle is right if necessary.
4. Hold your shelves up to the brackets mounted on the wall (this is definitely a two person job if your wood is heavy like mine) and very carefully mark the spaces where you’ll need to drill holes for the brackets. I would recommend also measuring the distance between the brackets and then crosschecking the measurements with your markings on the shelves several times to make absolutely sure you get the distance right.
5. Using a self-centering drill guide, drill your bracket holes with a 1/2” drill bit. You might need to pull the drill bit out a few times until you get the full depth you need in order to get rid of the excess wood it’s cutting through.
6. Scoot your shelves onto the steel brackets! You will likely need someone else to help you line them up, and it’s also important to note that even though we measured very carefully, made sure the brackets were mounted at 90 degrees, and used the self-centering drill bit to get perfectly horizontal holes this was not a super smooth process. It’s a very tight squeeze and you should expect to have to push them on pretty hard.
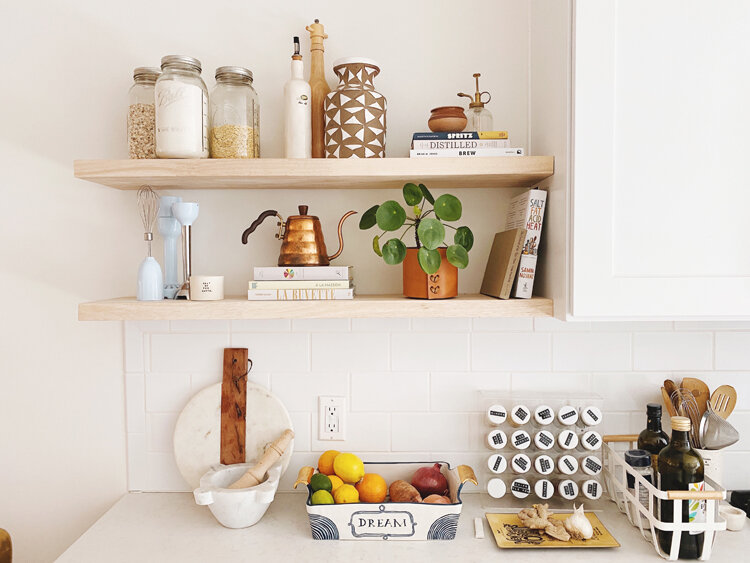
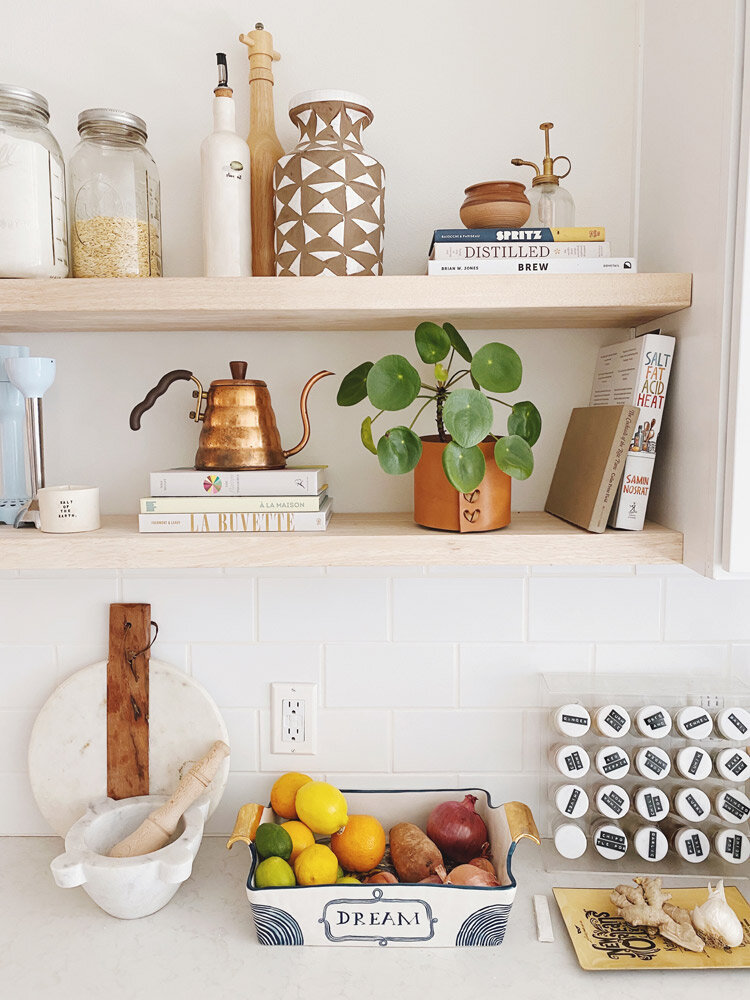
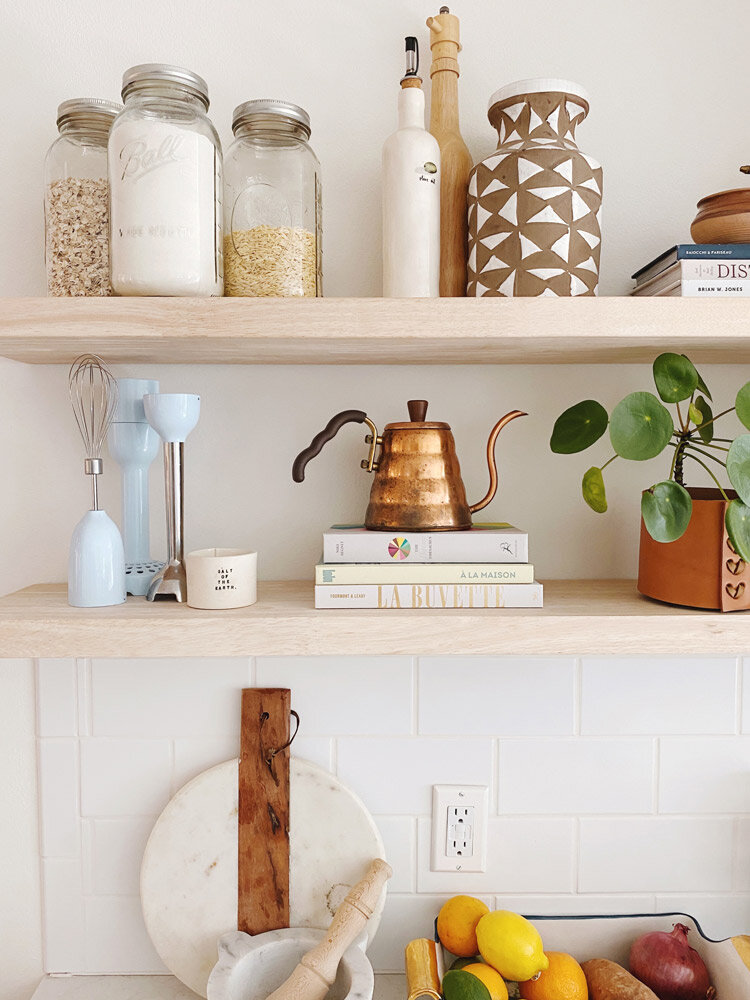
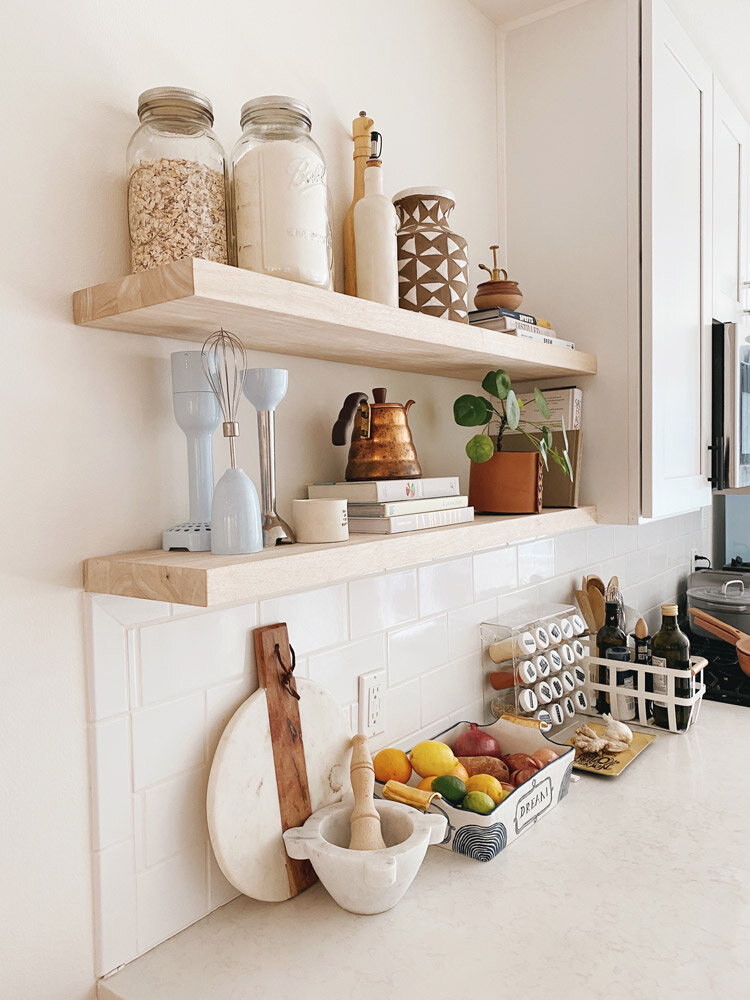
7. Style out your shelves and show off all your pretty fun stuff! I like adding a mix of form and function to shelves like this, so I chose to add some favorite cookbooks, a couple cute kitchen tools like my smeg immersion blender (it matches our fridge!), decanted grains (in these giant mason jars), a copper pour over kettle, and of course a pretty plant. The leather planter is from Right Tribe (one of my favorite local designers) and this one is similar too.

Shop the post (and my kitchen!)

How do you feel about floating shelves in the kitchen?? Have you ever DIY’d a shelf project?

Disclosure: We only recommend products we use ourselves and all opinions expressed here are our own. This post may contain affiliate links that at no additional cost to you, we may earn a small commission. Thanks!