Brush Lettering Basics: A Quick Tutorial
Is there anything more fun than wandering through the aisles of an art store and putting every last writing tool’s doodling potential to the test?
Ever since I can remember I’ve loved testing out every new kind of pen, marker, or paintbrush I could get my hands on, and today I’m taking you guys through the basic fundamentals of one of my favorite art forms at the moment - brush lettering!
If you follow me (Kate) on my personal/musician IG account you’ve probably seen me post about how much I love brush lettering, especially in watercolor paint and India Ink. I’ve been brush-lettering my song lyrics for a few years now, and after many requests for a how-to series I thought it would be fun to show you guys the basics!

The cool thing about brush lettering is that you don’t need a ton of fancy supplies - just watercolor paper, some watercolor paints, and a brush pen.
Supplies
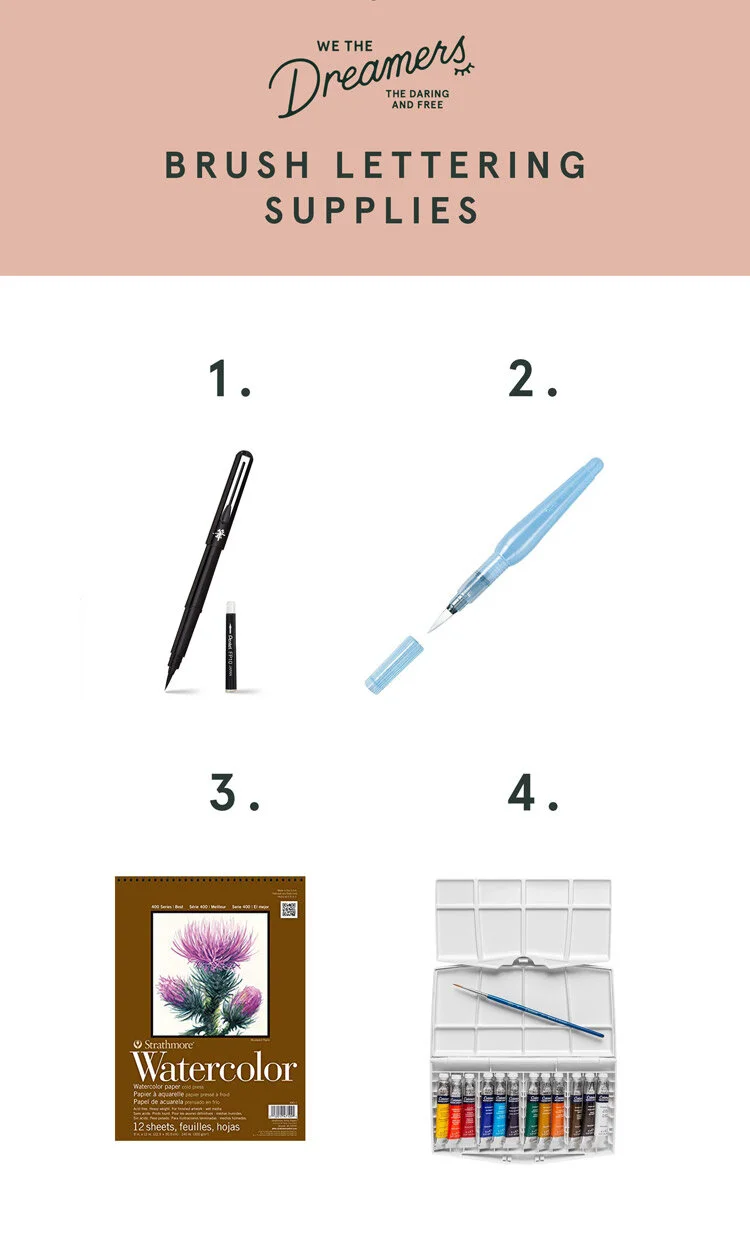
Any brand of watercolor paper or watercolor paints should work fine, but those two Pentel brushes are specific favorites for me (and I find them to be especially great for beginners because they’re specifically designed for brush lettering).

How To: Brush Lettering For Beginners
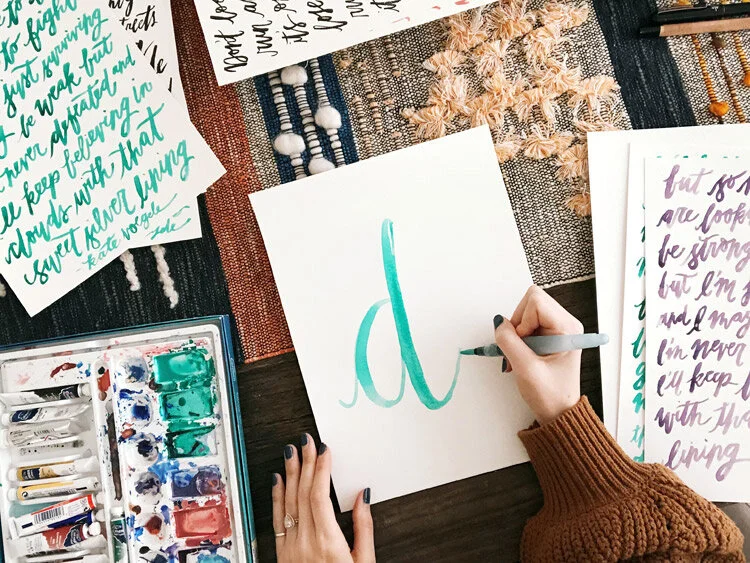
In this post, I’m going to take you through the basic technique of brush lettering, because once you have that down you’re pretty much good to go. I’ll take you through the steps and best practices for creating consistent letters, using a lowercase “d” as an example.
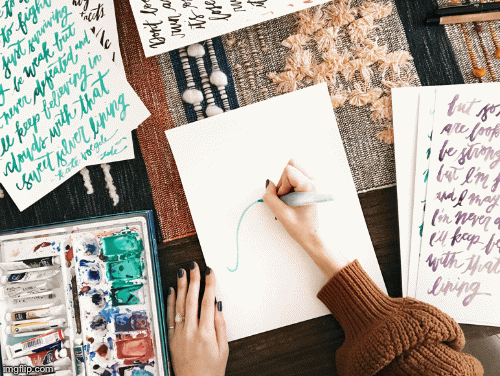
In the above GIF, you can see the '“d” come together and you can also see that it’s really pretty simple.
Follow these steps to learn how to create consistent letters:
1. Learn The Difference Between Upstrokes and Downstrokes
When you’re first starting, it helps to get a regular piece of printer paper and a pencil or regular pen and just write something in cursive - your name or whatever you want. Take notice of how cursive writing consists mostly of two types of strokes - upstrokes and downstrokes. As you can see demonstrated in the GIF above, the main rule of brush lettering is this:
Upstrokes = Thin Lines, Downstrokes = Heavy Lines
Once you get a feel for how your hand moves up and down when you write in cursive, you’re ready to start practicing with a brush pen.

2. Start Small and Practice Just One Letter
I like to tell people to start with the Pentel Pocket Brush Pen (the black india ink pen) because unlike the water brush pen you don’t have to keep loading it with paint. You can also easily practice with the Pocket Brush Pen on regular printer paper so as not to waste pricey watercolor paper.
Start with one letter (it doesn’t have to be giant like my letter “d” here, in fact it’s much easier to learn writing on the smaller side) and slowly practice writing that letter with the thin upstroke, heavy downstroke technique.
Tip: it helps to use the tip of the brush pen for the thin upstrokes and to sort of gently push the brush down to create a heavier line on the downstrokes.
Tip: When I brush letter, I almost always have the right side of my hand resting on the page (if you’re left handed that would be the left side obviously). Everyone is different, but I find it’s much easier to control the brush pen when you letter with the side of your hand resting on the page. I also let my whole hand move as I write (so it’s not anchored down in one place).

3. Practice Writing A Short Word
Pick something easy to practice writing over and over again with this same technique, and get a feel for how the letters link with one another when you write with thin upstrokes and heavy downstrokes.

4. Try Writing in Watercolors With the Water Brush Pen
Once you’ve gotten the hang of the writing technique, you’re ready to try it out with watercolor paint. Load the Water Brush Pen with water, and mix up a color from your paints - it’s probably easiest to just choose one color at first, and squeeze a small bit of paint onto the palette (a little goes a long way!) Then squeeze some water from the pen onto the paint blob, and mix it up.
Dip your water brush pen into the paint/water mixture, and practice your word on watercolor paper this time.
Tip: If it seems too “dry” or not fluid enough, add more water to the mix.
You’ll notice that when working with the water brush pen, you’ll need to reload the brush with the paint/water mix from time to time (sometimes in the middle of a word or letter). You’ll start to get a feel for how to pick a good stopping point for this (usually at the end of a ‘stroke,’ up or down), and the great thing about watercolor is that it all kind of blends together in a really beautiful way that makes it hard to tell where you reloaded your brush pen.

5. Try Brush Lettering A Short Phrase
Now that you’ve got a hang of the technique and experimented with both india ink and watercolors, try writing a sentence or phrase with your brush pen.
Tip: Don’t feel like the letters all have to “sit” on the same line - I actually find that brush lettering is really beautiful when you allow the letters to meander a bit and vary the height and placement of the letters within a word.
And that’s it! Though the basic technique can be a bit tricky and it take a minute to get the hang of it, it really does become much easier once you get used to the pens.
Keep practicing, and be sure to tag us on IG @wethedreamers if you give it a shot! Happy Brush Lettering!


Disclosure: We only recommend products we use ourselves and all opinions expressed here are our own. This post may contain affiliate links that at no additional cost to you, we may earn a small commission. Thanks!