DIY Cane Closet Doors: Bi-Fold Door Makeover
For as long as I’ve been obsessed with interiors, I’ve always swooned over all things cane - cane doors, caned furniture, the list goes on.
Between the color and the texture it lends to a space and its subtle boho, natural vibe, I’ve always wanted to DIY a project with cane mesh. This summer, our pantry door turned out to be the perfect candidate for a bi-fold louvered door makeover!
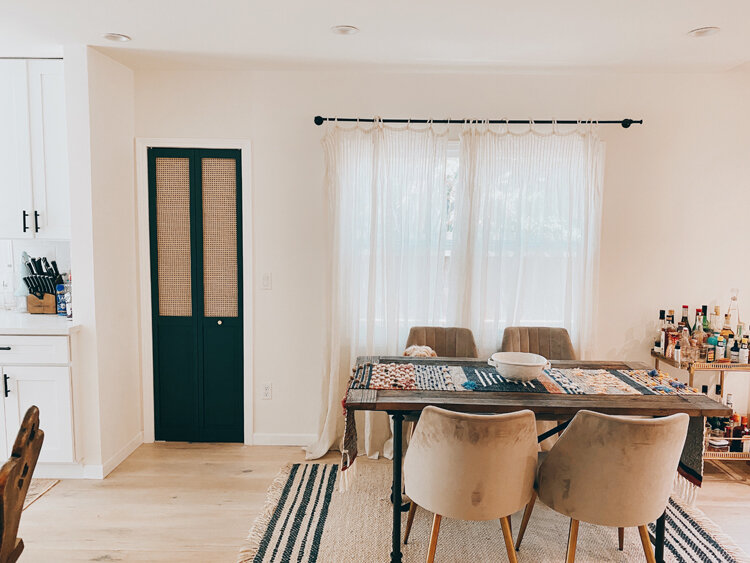
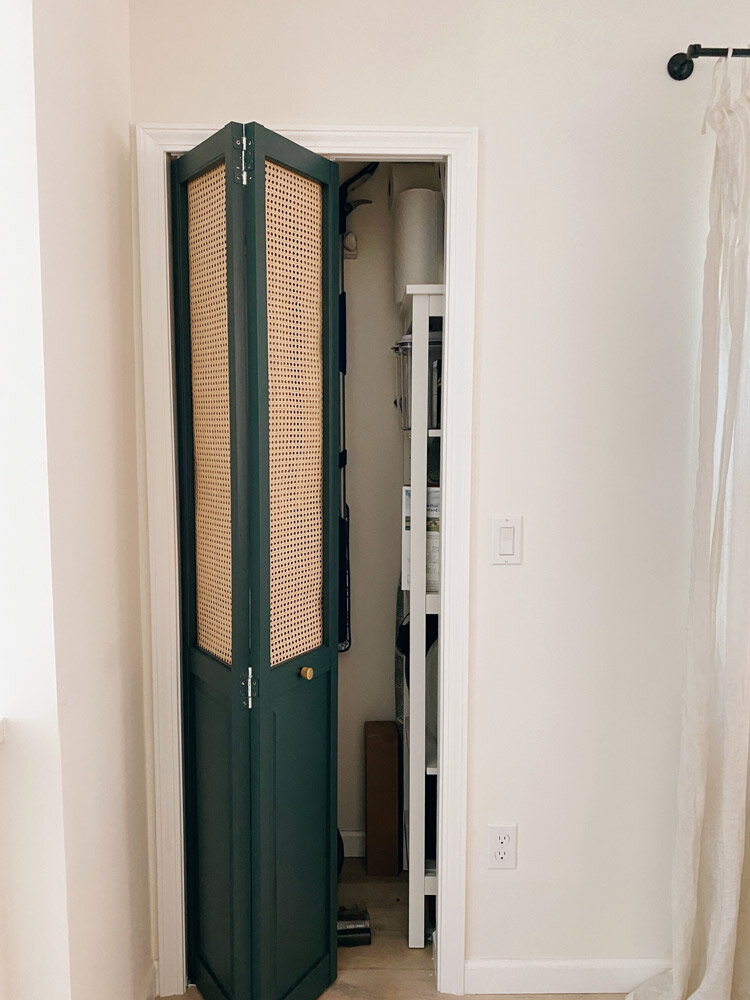
Outside of the two moderately sized bedroom closets, our house only has ONE other closet in it, and it’s this one. It’s pretty small, but because it’s in the middle of the main space it acts as our pantry and has turned out to be a perfect storage spot for the vacuum, brooms, and admittedly a bunch of random stuff that doesn’t go anywhere else.
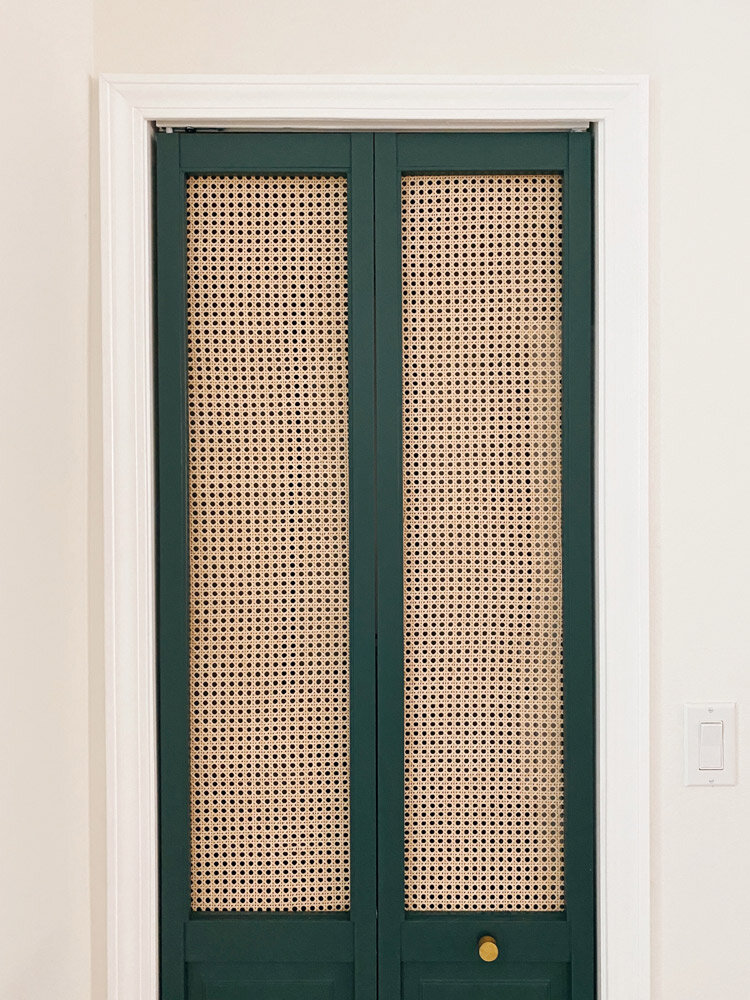
Below is a before and after of what the closet / pantry looked like before we DIYed these doors:
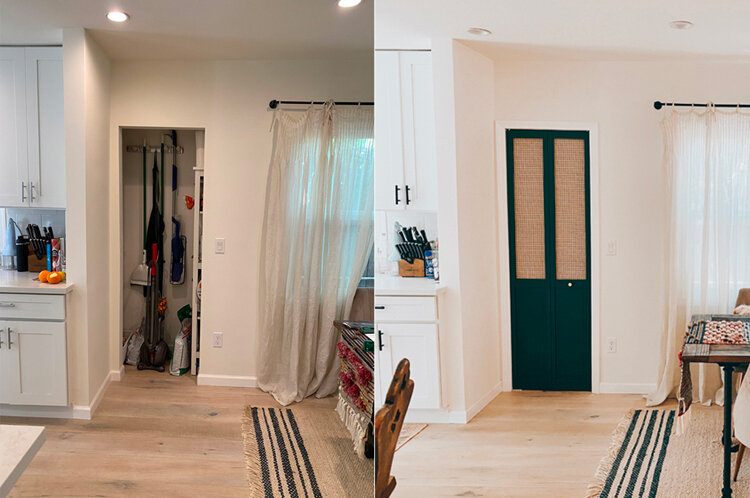
When we moved in, there were no closet doors in the whole house. I knew I wanted to DIY something fun for the pantry, because it’s visible pretty much everywhere in the main part of the house. Having no door on this closet was becoming a major eyesore for me, so I couldn’t wait to tackle this project!
After consulting a few helpful blogs around the internet, I came up with a plan to make these and it was honestly relatively easy! The most tedious part of the process for me was painting the doors, but if you don’t mind employing a little patinece between coats it’s a pretty straightforward process.
I actually ended up painting my doors the same color as the IKEA Built-In Bookshelves Hack in my studio, and I loved bringing this color into another room!
Here’s how we did it:
DIY Cane Bi-Fold Closet Doors
Supplies:
1, 24 in. x 80 in. Louver/Panel Interior Closet Bi-fold Door
3, 1/4 in. x 3/4 in. x 96 in. Hemlock Wood Screen Moulding (to cover the louver holes)
at least 48” of mesh caning (I ordered the W901U - Unbleached 1/2" Open Mesh from this site, and I ordered 8 feet of it in case I messed up)
Paint color of your choice (I used Benjamin Moore Hidden Falls)
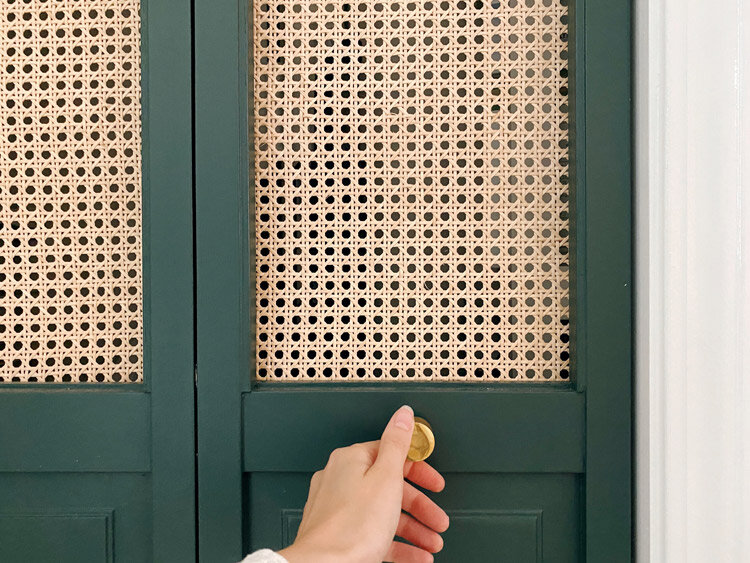
Knob for the door, if you’re changing it out (I used this gold one from CB2)
**my pantry closet opening did not have a door frame yet, so we had to build one ourselves. Here’s what we used for that:
11/16 in. x 2-1/4 in. x 84 in. Pine Primed Finger-Jointed Casing (for the outside of the door frame)
1/2 in. x 1-5/8 in. Pine Stop Moulding (for the inside of the door frame)
Paint color for door moulding
Tools:
Electric sander and sandpaper
Circular saw or jig saw (to cut and loosen louvers)
Instructions:
1. Sand the bi-fold doors on all sides and edges with an electric sander (I probably didn’t sand mine enough and it made painting more frustrating, so I’d make sure to do a thorough job here especially if you couldn’t find a plain, raw wood door). Because I could only find a door that was already white and knew I wanted to paint it a dark color, it made this step really crucial.
1.5. If you’re also installing a door frame, now is the time to do that. Make sure you measure super carefully so you know exactly how much space you’ll need for your bi-fold doors before creating your door frame.
2. Install the door hanging hardware on your door frame and hang the unpainted door first to make sure it fits in the space - mine was just a tad too tall for our door opening and we ended up having to shave a little over an inch off of the top with a saw.


3. Remove the louvers / slats from your doors. We just took a circular saw and made a cut down the middle of the louvers, and that made them pretty easy to just pull out.
4. Cover the louver holes with your wood screen moulding, nailing in place with a nail gun. Sand the moulding.

5. If desired, clean up any cracks between the screen molding and the door with caulk, and cover any nail gun holes with wood filler.
6. Paint all sides of your doors, paying particular attention to the side that will be facing out. My inside facing side ended up getting kind of banged up in the process, but it’s fine because no one sees it! **Be SURE to wait at least 12 hours or however long the paint manufacturer recommends in between paint coats. Since these are bi-fold doors, I recommend painting the door faces of both sides first, then standing the doors upright in a garage or large open space to paint the hinged sides that face each other when the door is closed.

7. Cut your caning to size and staple in place to the backs of the bi-fold doors with a staple gun. This is definitely much easier with two people so you can pull the caning taut and keep it from getting too crooked.

8. Re-install your door in place on its hanging hardware!

The only thing I wasn’t able to fully figure out with this DIY were the door hinges. At first I naively tried painting them the same color as the door, but quickly realized that the paint doesn’t stick and it just makes them squeak. Ideally I would have loved to change them out for gold hardware, but weirdly this size of hinge was super hard to find with all of the holes in the right places. It doesn’t really bother me though, because you really only see them when the door is open and the whole point of this DIY was to make a door that will stay closed 95% of the time anyway, ha!
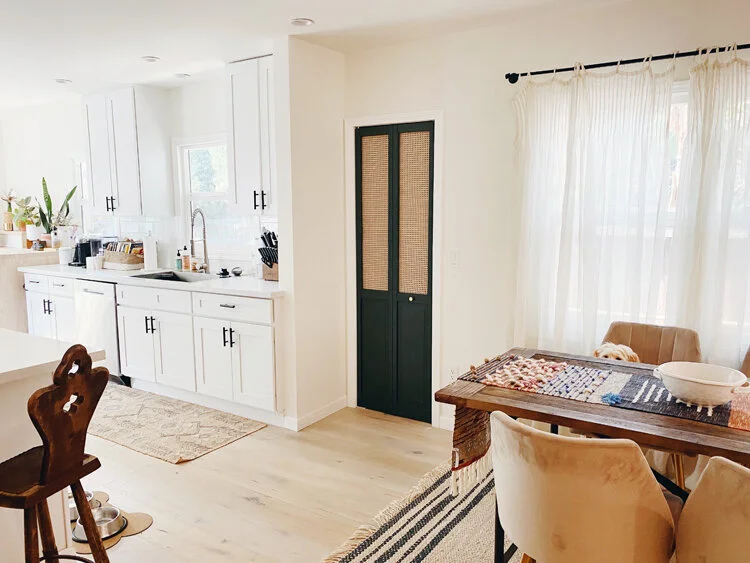
Other than that, I’m so so happy with how it turned out!

Have you ever DIYed a door or closet door? We have two more closets in the bedrooms that I have yet to tackle, so let me know what kind of DIY I should try next on one of those!

Disclosure: We only recommend products we use ourselves and all opinions expressed here are our own. This post may contain affiliate links that at no additional cost to you, we may earn a small commission. Thanks!