Chocolate Holiday Tree Cookies With Royal Icing
tis’ the season for twinkle lights, snowball fights, and festive bites.
Courtney here — every holiday season I make a new batch of holiday cookies, and for the past three years, I’ve done trees.
there’s something about them that is so whimsical to me, and so many possibilities when it comes to decorating (one year I made them all pink!).

you may have seen my royal icing bat cookies from Halloween, and although the vanilla cookie is delicious, nothing tops this recipe for a fudgy, cocoa-filled version.
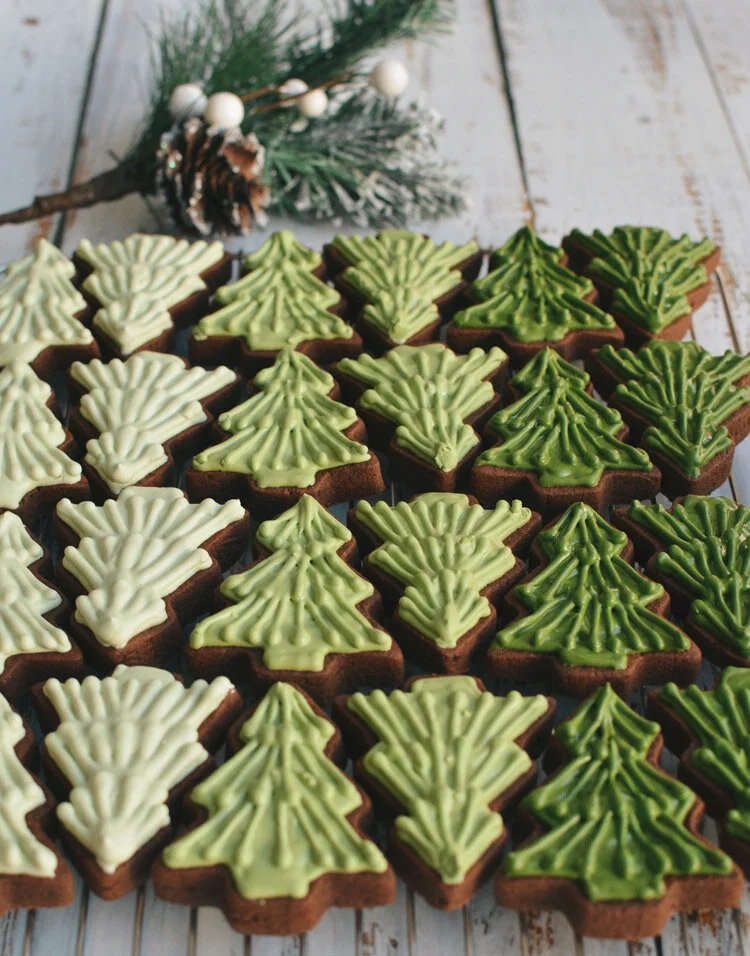
after we decorated our apartment for the season last weekend, I popped on this Holiday Pop Playlist and got my bake on. I decided to keep the decorating part relatively simple, but play around with colors and shades — I went for an “ombré” look this time.
if you’re looking for a chocolate holiday cookie recipe where you can let your creativity run wild, look no further!

Chocolate Holiday Cookies with Royal Icing
Chocolate Sugar Cookie Cutouts:
(recipe originally from Sweetopia)
2 cups unsalted butter at room temperature
2 cups sugar
2 large eggs
3 tsp vanilla
4 cups all-purpose flour
1 ½ cups cocoa powder
1 tsp salt
Directions:
Cream together butter and sugar on low-medium speed with the paddle attachment for about one minute. Scrape down sides of bowl and mix for a few seconds more.
Add eggs and mix slowly. Scrape down sides of bowl and mix again for a few seconds.
Add vanilla extract and stir briefly.
In a separate bowl, sift together flour, cocoa, powder and salt.
Add flour mixture to bowl and mix on low speed for 30-45 seconds. Once it starts to clump around the paddle attachment, it’s ready!
Lay down a piece of parchment paper, place the dough on top, and place another piece of parchment paper on top (creating a “sandwich” with the dough in between). Roll out the dough between the parchment paper with a rolling pin to about ½ an inch thickness (or however thick you want your cookies to be).
Place in the fridge for one hour minimum (if you want your cookies to hold shape, don’t skip this part!)
Take dough out of fridge and remove top layer of parchment paper. Cut out cookie shapes with your cookie cutter of choice, place on a parchment paper-lined baking sheet and place in the fridge for another 10 minutes at least.
Preheat the oven to 350°F.
Bake cookies for 8-12 minutes (I did mine for about 11). You will know when they’re done when the center of the cookie no longer looks wet.
Let cookies cool completely, then it’s time to decorate!
Royal Icing Recipe:
(originally from Emma’s Sweets, I halved her original recipe)
4 cups of confectioner’s sugar
4 tbsp meringue powder
⅓ cup of warm water
½ tsp vanilla
Food coloring of your choice
Directions:
Pour powdered sugar into your mixer.
In a separate bowl, whisk together your ⅓ cup of water and your meringue powder until combined.
Pour the meringue mixture into the mixer with your powdered sugar and mix on low speed until combined.
Turned mixer setting on a little higher for about 1 minute, add vanilla, then mix on medium speed for about 4-5 minutes.
Add water gradually (using a spray bottle is recommended) until you reach your desired consistency. This time, I used a thicker consistency that allows you to pipe and flood with the same frosting.
Decorate as you please! I started by separating my cookies into three different groups, one for each ombre color (light, medium, and dark green). I started by mixing the lightest green color (I used moss green), then filled my piping bag, outlined each cookie (I used a Wilton tip #3), then flooded each one after. After letting them dry for 5 minutes, I started from the bottom and moved by piping bag upwards towards the center to create the little pine needles / branches. I did this for all three “layers” of the tree. I added more green food coloring to the frosting, and repeated the process twice until I achieved that ombre look.

i’d love to hear about some of the holiday treats you all have made. drop them in the comments below!
hope everyone has a happy holiday and a wonderful new year!
